If you are like me, you have a hard time staying indoors this time of year. The warmer spring and summer temperatures do beautiful things to my landscape.

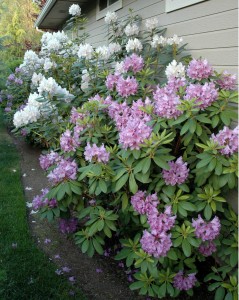
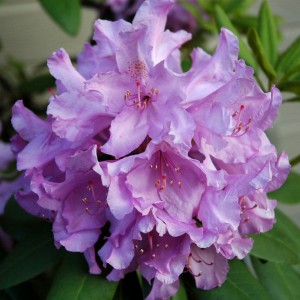
Each year, as I spend time in my yard, I fall more in love with our rhododendrons. We have beautiful rhododendrons planted on the side of our home. They are an easy shrub to plant and care for and will add an instant POP to any spring landscape.
 If you have a shady planter area you are looking to spruce up, rhododendrons are a great choice. They are popular flowering shrubs that bloom in the spring. They will flourish in both temperate and tropical locations as long as they are planted correctly and are protected from hot midday sun.
Choose a location with light shade for your new rhododendrons. A northern location is a good choice. Make sure your site is well-drained and the soil is acidic. You’re shooting for a pH of 5.5, but 1.0 more or less either way is acceptable. The more acidic, the better.
Instructions for planting your rhododendrons
- Carefully remove the rhododendron from its grower’s container. If the root ball is dry, soak the roots in a tub of water for about an hour.
- Gently loosen the outer roots with your fingers to improve their contact with the new soil. Don’t worry if some of the soil falls off. If the rhododendron is root-bound, trim the ends of them with sharp, clean shears. If any longer roots are wrapping around the root ball, cut them off even with the rest of the roots. Root trimming will encourage healthy new root growth.
- Dig a hole at least a foot larger in diameter than the rhododendron’s root ball. The depth should be such that when you set the plant in the hole, the top of the root ball will be exactly level with the ground’s surface. Rhododendrons can be easily damaged or even killed if they’re planted too deeply. Center the plant in the hole and begin filling with soil, firming it around the root ball as you go.
- Mulch the newly planted rhododendron 2 to 3 inches deep with pine needles. Mulching will help preserve moisture in the soil for these shallow-roots plants and will discourage weeds. Pine needles also offer the advantage of having an acidic pH of their own, so they’ll help to add and maintain acidity to the planting.
- Water the rhododendron very well so the soil is moist but not soggy. These plants love moisture, but they do not like a wet location. Make sure that the plant remains moist at all times, and be especially mindful of extended dry spells, even during the fall. Allow the soil to dry out slightly in between waterings.
- Fertilize the rhododendron with a good 4-6-4 shrub food and some iron sulfate in the spring according to the manufacturer’s packing instructions. Apply these in the spring, before the plant begins to bloom.

- Pinch or trip off the tips of excessively long stems in the rhododendron’s first early spring to encourage bushy habit. Avoid pruning the plant after that and allow it to develop naturally so that you don’t cut off next year’s blooms. Established plants really shouldn’t be pruned at all, unless they’re getting too tall for your taste.
- Treat rhododendrons for insect or disease issues only if you notice a problem, as they are normally robust and virtually pest and disease free.
I hope that you too can have success with rhododendrons and are able to enjoy their beautiful spring color year after year. Now go out and get some dirt in your fingernails and enjoy adding color to your yard!