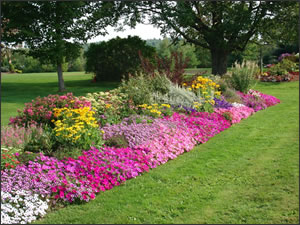
 One of my favorite things about spring landscape is seeing yards come to life with color and vitality by planting summer annuals. I think it must take me back to my childhood. My mother would spend hours in the yard beautifying our landscape. I remember she won an award one year for the most beautiful curb appeal. She loved to play with color and design and created gorgeous masterpieces year after year.
You too can easily spruce up your yard and curb appeal with color by planting easy care annual flowers.
Secrets to success with annuals
- Sun or Shade: Plant tags usually tell you whether a plant prefers sun or shade. Sun means they can take sunshine all day, but they’ll also do well with four to six hours, especially if it’s in the afternoon. The important part to remember for shade plants is that they will take some sun, but not the strong sun that burns down all afternoon. Morning sun is better for these plants.
- Prepare your soil: Loosen up your dirt with a tiller or shovel. If your dirt is really hard a tiller will work best. You’ll want to break up the dirt abut 5-6 inches down. Get rid of all the big chucks as best you can. Once the dirt is loosened up, mix in a good fertilizer to feed the plants. We like to use Milorganite which you can find at any home and garden center. Milorganite is an excellent organic nitrogen fertilizer that is safe for all plants that grow outdoors. It’s great for beginners because it’s practically goof-proof since it won’t burn plants even if it’s over applied. Follow the directions on the bag for how much to use. Take your trowel and mix it in with the dirt. Now the dirt is ready for your flowers!
- Planting and spacing: I like to start by placing the flowers in the area where I want to plant them. This way I can play with the design before I bury them in the dirt. Play with color and pattern and get creative with your design. Once you have a design you like, it’s time to start planting. Usually, the tag will say to plant 8 to 12 inches apart, so pick 8 inches for a great show of flowers more quickly. I just measure off the spacing with my trowel. If the plants are a bit pot-bound (roots circling around), cut an X into the bottom with a knife or use your fingers to tease them apart so they make better contact with soil. Take your trowel, pull aside the dirt just deep enough to reach the top of the root piece. Place your flower in the ground and bury it, pressing the dirt around the plant firmly.
- Watering: Annuals need water to thrive. Water them deeply two to three times a week after planting. The moist soil will encourage good growth. For the best show of color all summer, don’t let up on the watering.
- Feed your plants: Once a week, feed your plants with an all-purpose fertilizer that you mix with water. Something like Miracle-Gro works well or my neighbor swears by Green Lite Super Bloom (from Lowes), and she has beautiful window baskets and planter beds. You’ll find traditional or organic fertilizers – either will do the job.
Gardening is a great way to be creative, spend time with family and soak in some vitamin D. So now is the time to get outside and get your hands dirty, because as we like to say, “a little dirt never hurt!”